When your car gets the inevitable scratch, and the question comes to mind: Do it myself or pay someone to do it for me? For minor damage like keying, chips or other light scratches, it can be a rewarding do-it-yourself job, if you follow these 5 steps:
Step 1: Get the exact paint for your car.
Dab, don't "stroke" for blob free repairs.
First is find your color, there is no point in a do-it-yourself job if the end result is going to turn out the wrong color and be more noticeable then what you had before. There are many different names of colors on the market, just because you have a jewel red pearl on your Chevy does not mean that it is the same jewel red pearl on an Audi. This is why it is important to find your proper color code. The main areas to look are driver or passenger door jams, in the glove box, under the hood near the fire wall or in the trunk results may vary by manufacturers.
Step 2: Determine what can, and cannot be "touched up."
After locating your color and purchasing it, either from an online retailer Scratchwizard or your local car dealership, find what spots you will be able to do-it-yourself. Any major dent or dings larger than a nickel usually need professional help. Scratches larger then a pencil eraser will also need more care. Wash your car thoroughly and discover where you need to touch up, a little paint goes a long way, so if you have multiple scratches for longevity of the touch up paint it might be easier to reorder than order more than you need. Test your color on either on a piece of sheet metal or in a inconspicuous spot i.e. under the hood, trunk or in wheel well.
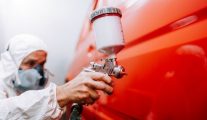
Step 3: Clean first, for a permanent repair.
Make sure to remove any wax residue by either using household soap: dawn or Windex, or a wax grease remover. For rust to continue it needs oxygen and most primers or fillers will inhibit this. To try to file or scrap off will cause more damage that might not be a Do-It-Yourself project. Apply the primer or filler to the area and allow it to dry.
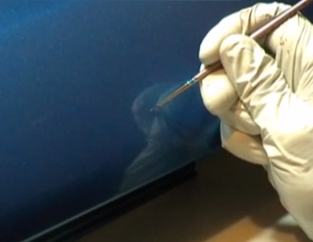
Step 4: With a fine-tipped brush, apply paint with a "connect the dots" technique to avoid blobs.
Apply the paint to the affected area with the finest-tipped touch up brush available. Remember that the paint should not be used as filler, or you will end up with globs. A little goes a long way, and you can always come back for a second coat, dabbing is recommended as it does not leave stroke marks. If a second coat is needed let the paint thoroughly dry before adding second and subsequent coats. Keep the touch up paint on the filler or primer of the affected area and not on the factory paint. The prime settings for painting are out of direct sun light and around 70 degrees, any lower in temp it will take longer to dry.
Step 5: Polish your paint after 24 hours for best results.
Let cure for a day, after wash vehicle, polish and wax it by hand, giving extra attention to applied area as to blend in with the existing paint and give it a nice glossy shine. After you are done with the repair job, leave the extra touch up paint in a closed container and in a cool dry place for future use.