In this tutorial you will learn how to purchase, paint, and install a replacement plastic bumper on your vehicle, for about half the cost you would pay an auto body repair shop.
This is a rear bumper for a 2003 Odyssey. I called local car dealers and was quoted about $475 for this piece. I ended up buying it from Rockauto.com for $315 including shipping, and it showed up in about 4 days. Another good source for pieces like this is ebay.
What You'll Need:
- Automotive Clip Puller
- Phillips Screw Driver
- 4 Half-sheets 600-Grit Sandpaper
- 3 Spray Cans Factory-Matched Paint
- 2 Spray Cans Automotive Clear Coat
- Dust mask or respirator
- 4 oz. Wax & Grease Remover
- Lint-free Cloth
- 10 mm socket
- 8 mm Socket
Time Required:
3 hours
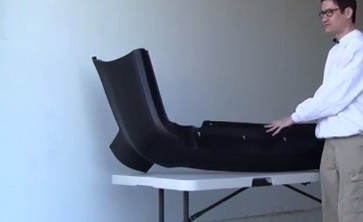
Step 1: Clean and Prepare Bumper
Your bumper is going to arrive with a black primer already applied, but it tends to be a little bit rough and have some flaws, so you're first going to want to wet sand the whole bumper with 600-grit sandpaper.
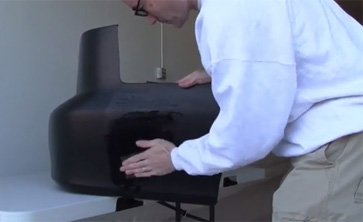
When you are done, wipe down the entire bumper with wax and grease remover. Apply wet with one disposable towel, and dry with a separate shop towel.
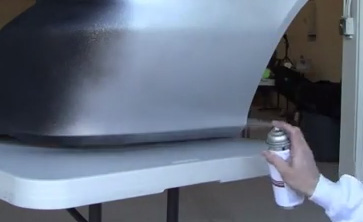
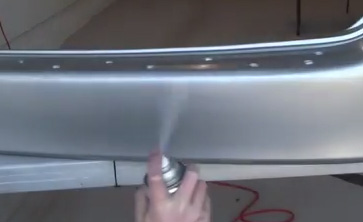
Step 2: Apply Basecoat
Shake your basecoat can for about a minute. When spraying make sure you're at a distance of about 12 inches (the span of your pinky to your thumb). Spray very light coats so that you don't get a run, and try to apply your paint with each pass so that it overlaps the previous pass by about 50%.
Important Notes
If you're spraying silver or gold it is important to throw in some vertical strokes to avoid getting a "tiger-strip" effect.
If you're spraying in your garage, make sure that you have the garage door open; wear a dust mask at the minimum, or a respirator if you have one.
If you're spraying in a temperature of below 55 degrees, using a heat gun at a distance of 12 inches really speeds up the drying of your base coat.
I'm gona let it sit fro aobut 15 mintues before I apply my clearcoat.
Step 3: Apply Clearcoat
Let the bumper dry for about 15 minutes before applying clearcoat. Applying clearcoat is similar to basecoat: give it from a distance of about 12 inches, apply light coats, and overlap by about 50% with each pass.
Let the bumper dry for six hours. If you get a run, after six hours wet sand with 600-grit sandpaper, then apply a little bit of basecoat and clearcoat.
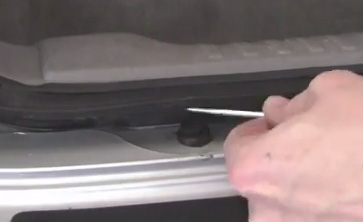
Step 4: Remove Old Bumper
Locate all of the clips bolts and screw sholding it in place.
To remove these clips insert a screwdriver and loosen the male part of the clip, pull up, and then use your clip puller to get under the female part of the clip.
Once you have all of your clips and bolts out, it should come out without much force. If you are having trouble removing it, check again; you might have to remove tail lamps.
Step 5: Install New Bumper
Remove and transfer any plastic trim from the old bumper to the new bumper.
If you have a foam absorber inside the bumper strucutre and you are having trouble keeping it in place, tape it down temporarily.
Once the bumper is attached, replace the bolts out clips you took out in the previous step. When applying clips take the male part of out of the female; the female part goes in first, the male afterwards.